A few years ago, I bought an HP1661CS logic analyzer. This is part of HP’s 1660C series, with an added 2 channel oscilloscope integrated. Unfortunately I wasn’t lucky enough to get one with a network interface included. However, my friend Stephen (of TerribleFire fame) had a similar device but with the network interface included. Having inspected the two ‘scopes, I’ve worked out how to upgrade any HP1660 series scope with what HP call “Option 015” – the Ethernet interface and support for using it over X11, NFS, and FTP.
The differences between the models with and without the ethernet interface are very limited; most of the hardware for ethernet is present in all models. The differences are:
- Ethernet-capable models have 8MB of RAM instead of 4MB – this is a simple 72-pin SIMM installed on the CPU card.
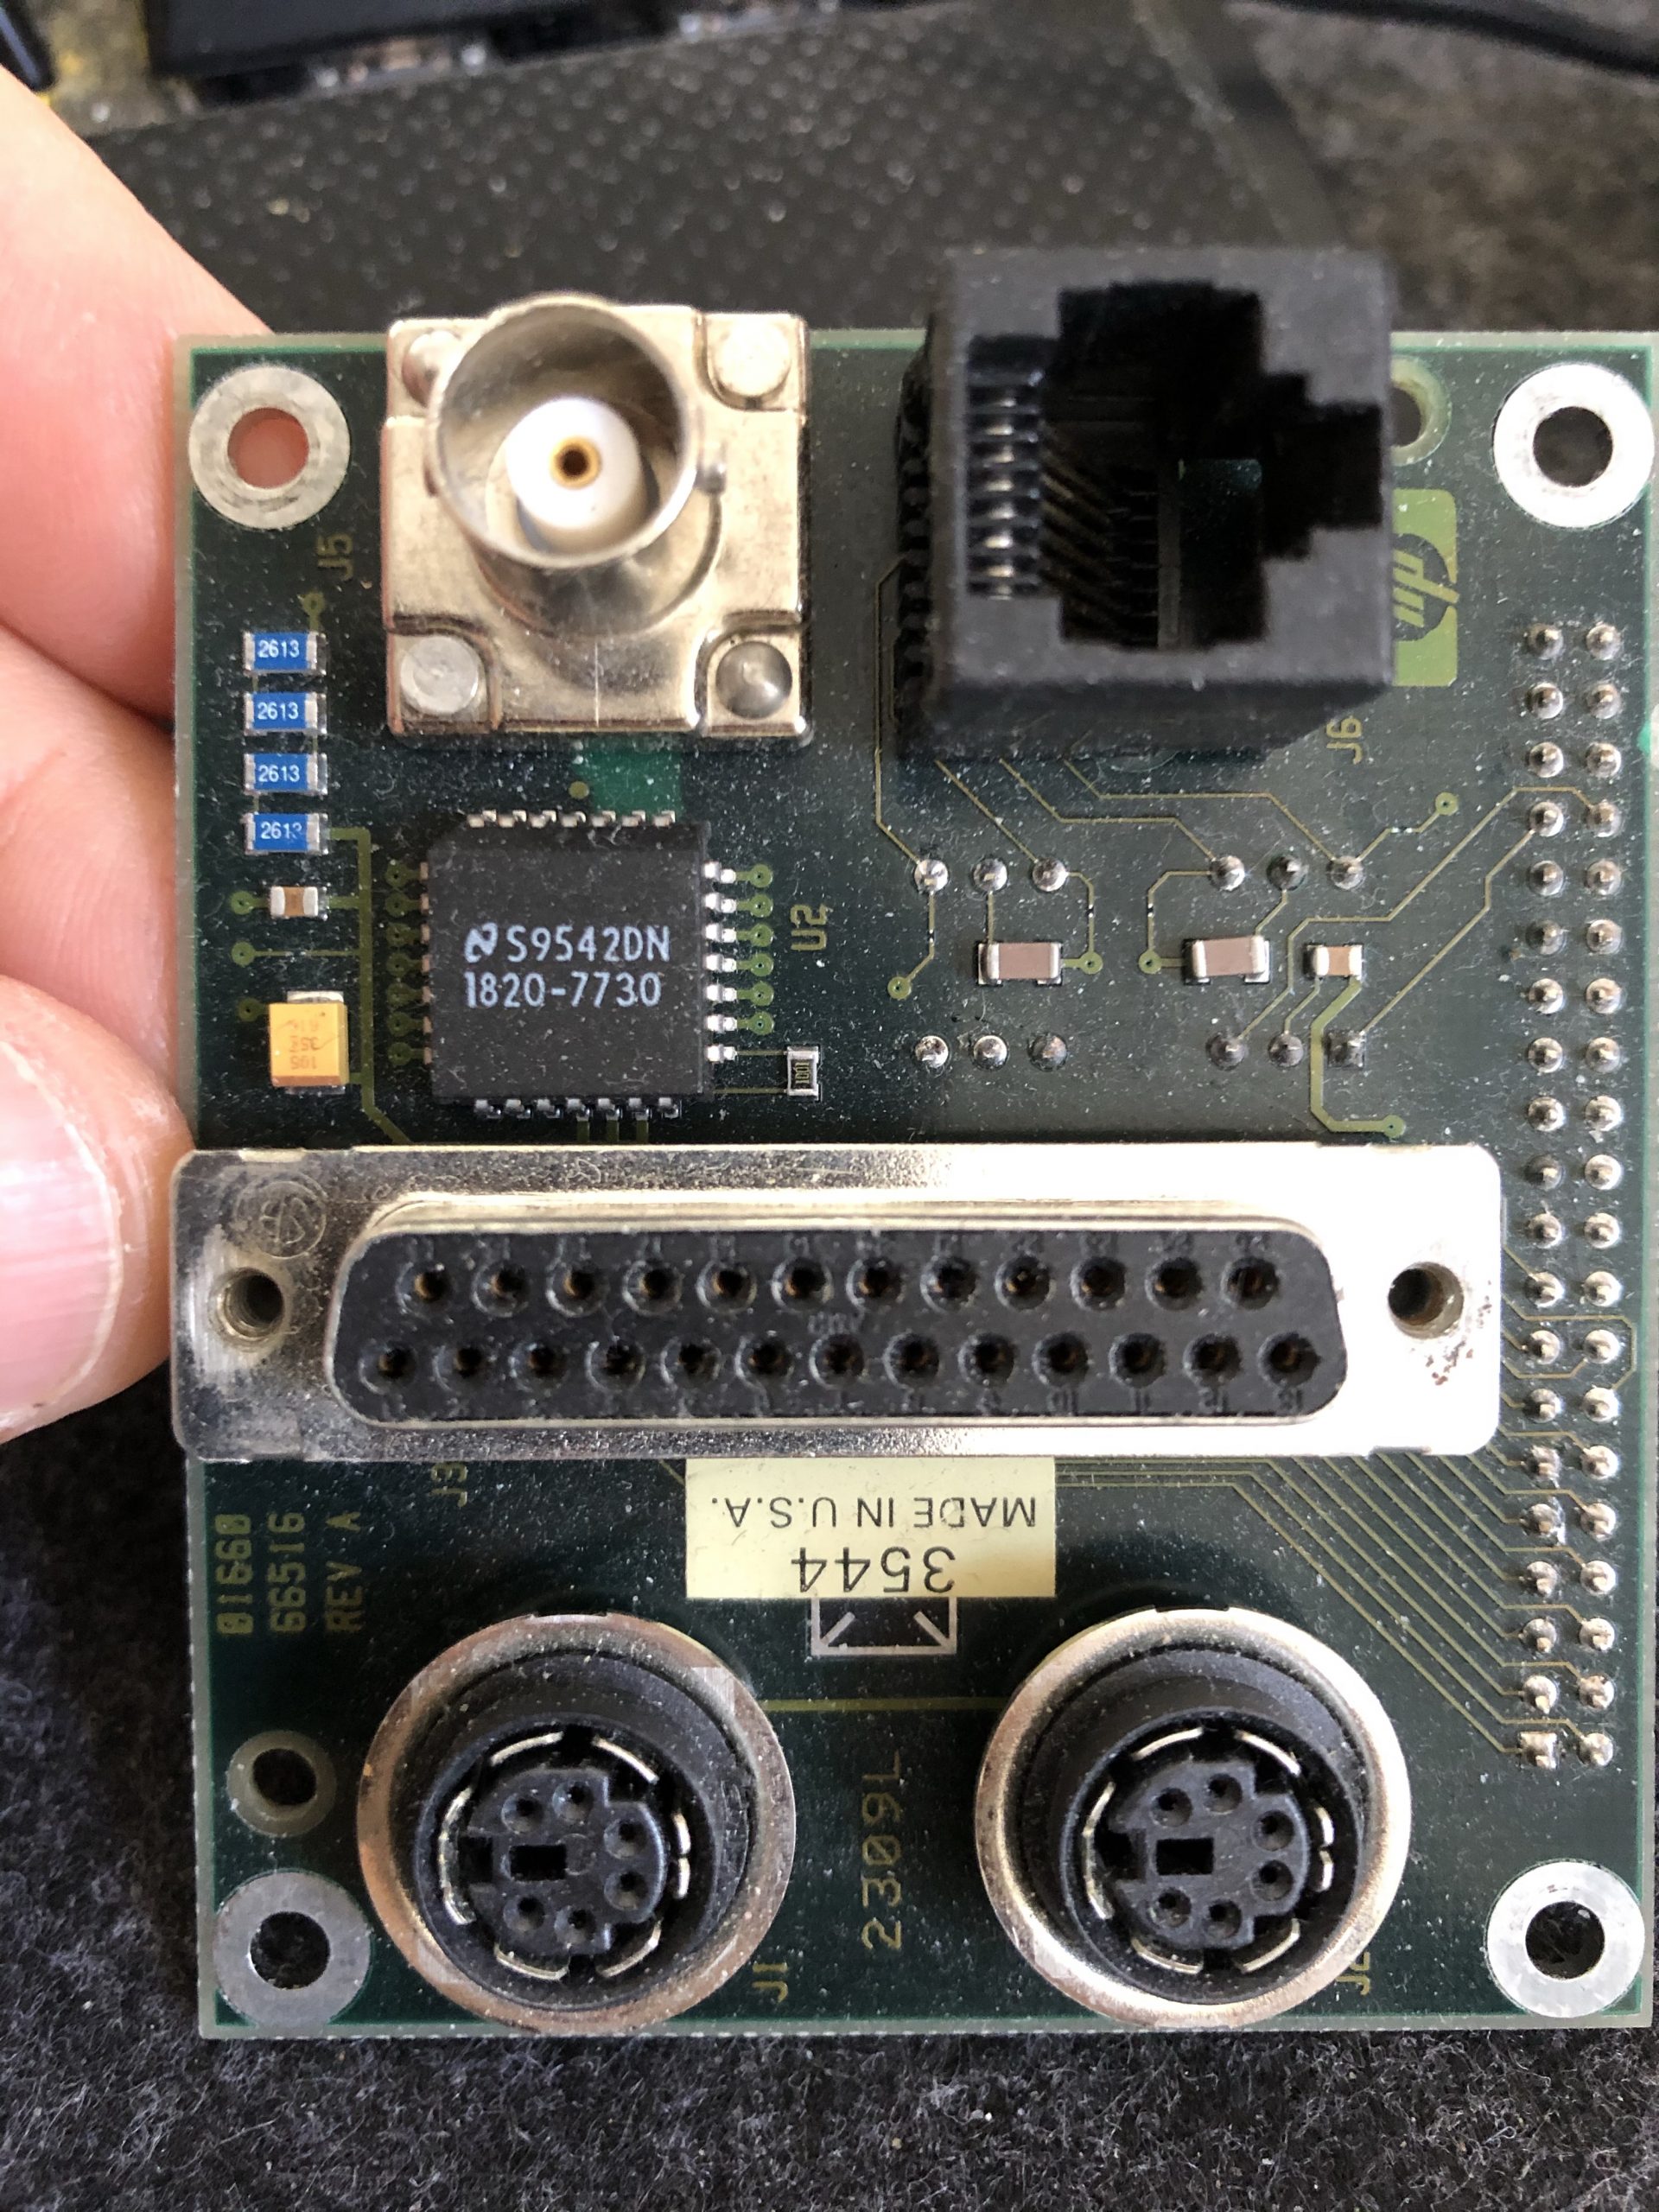
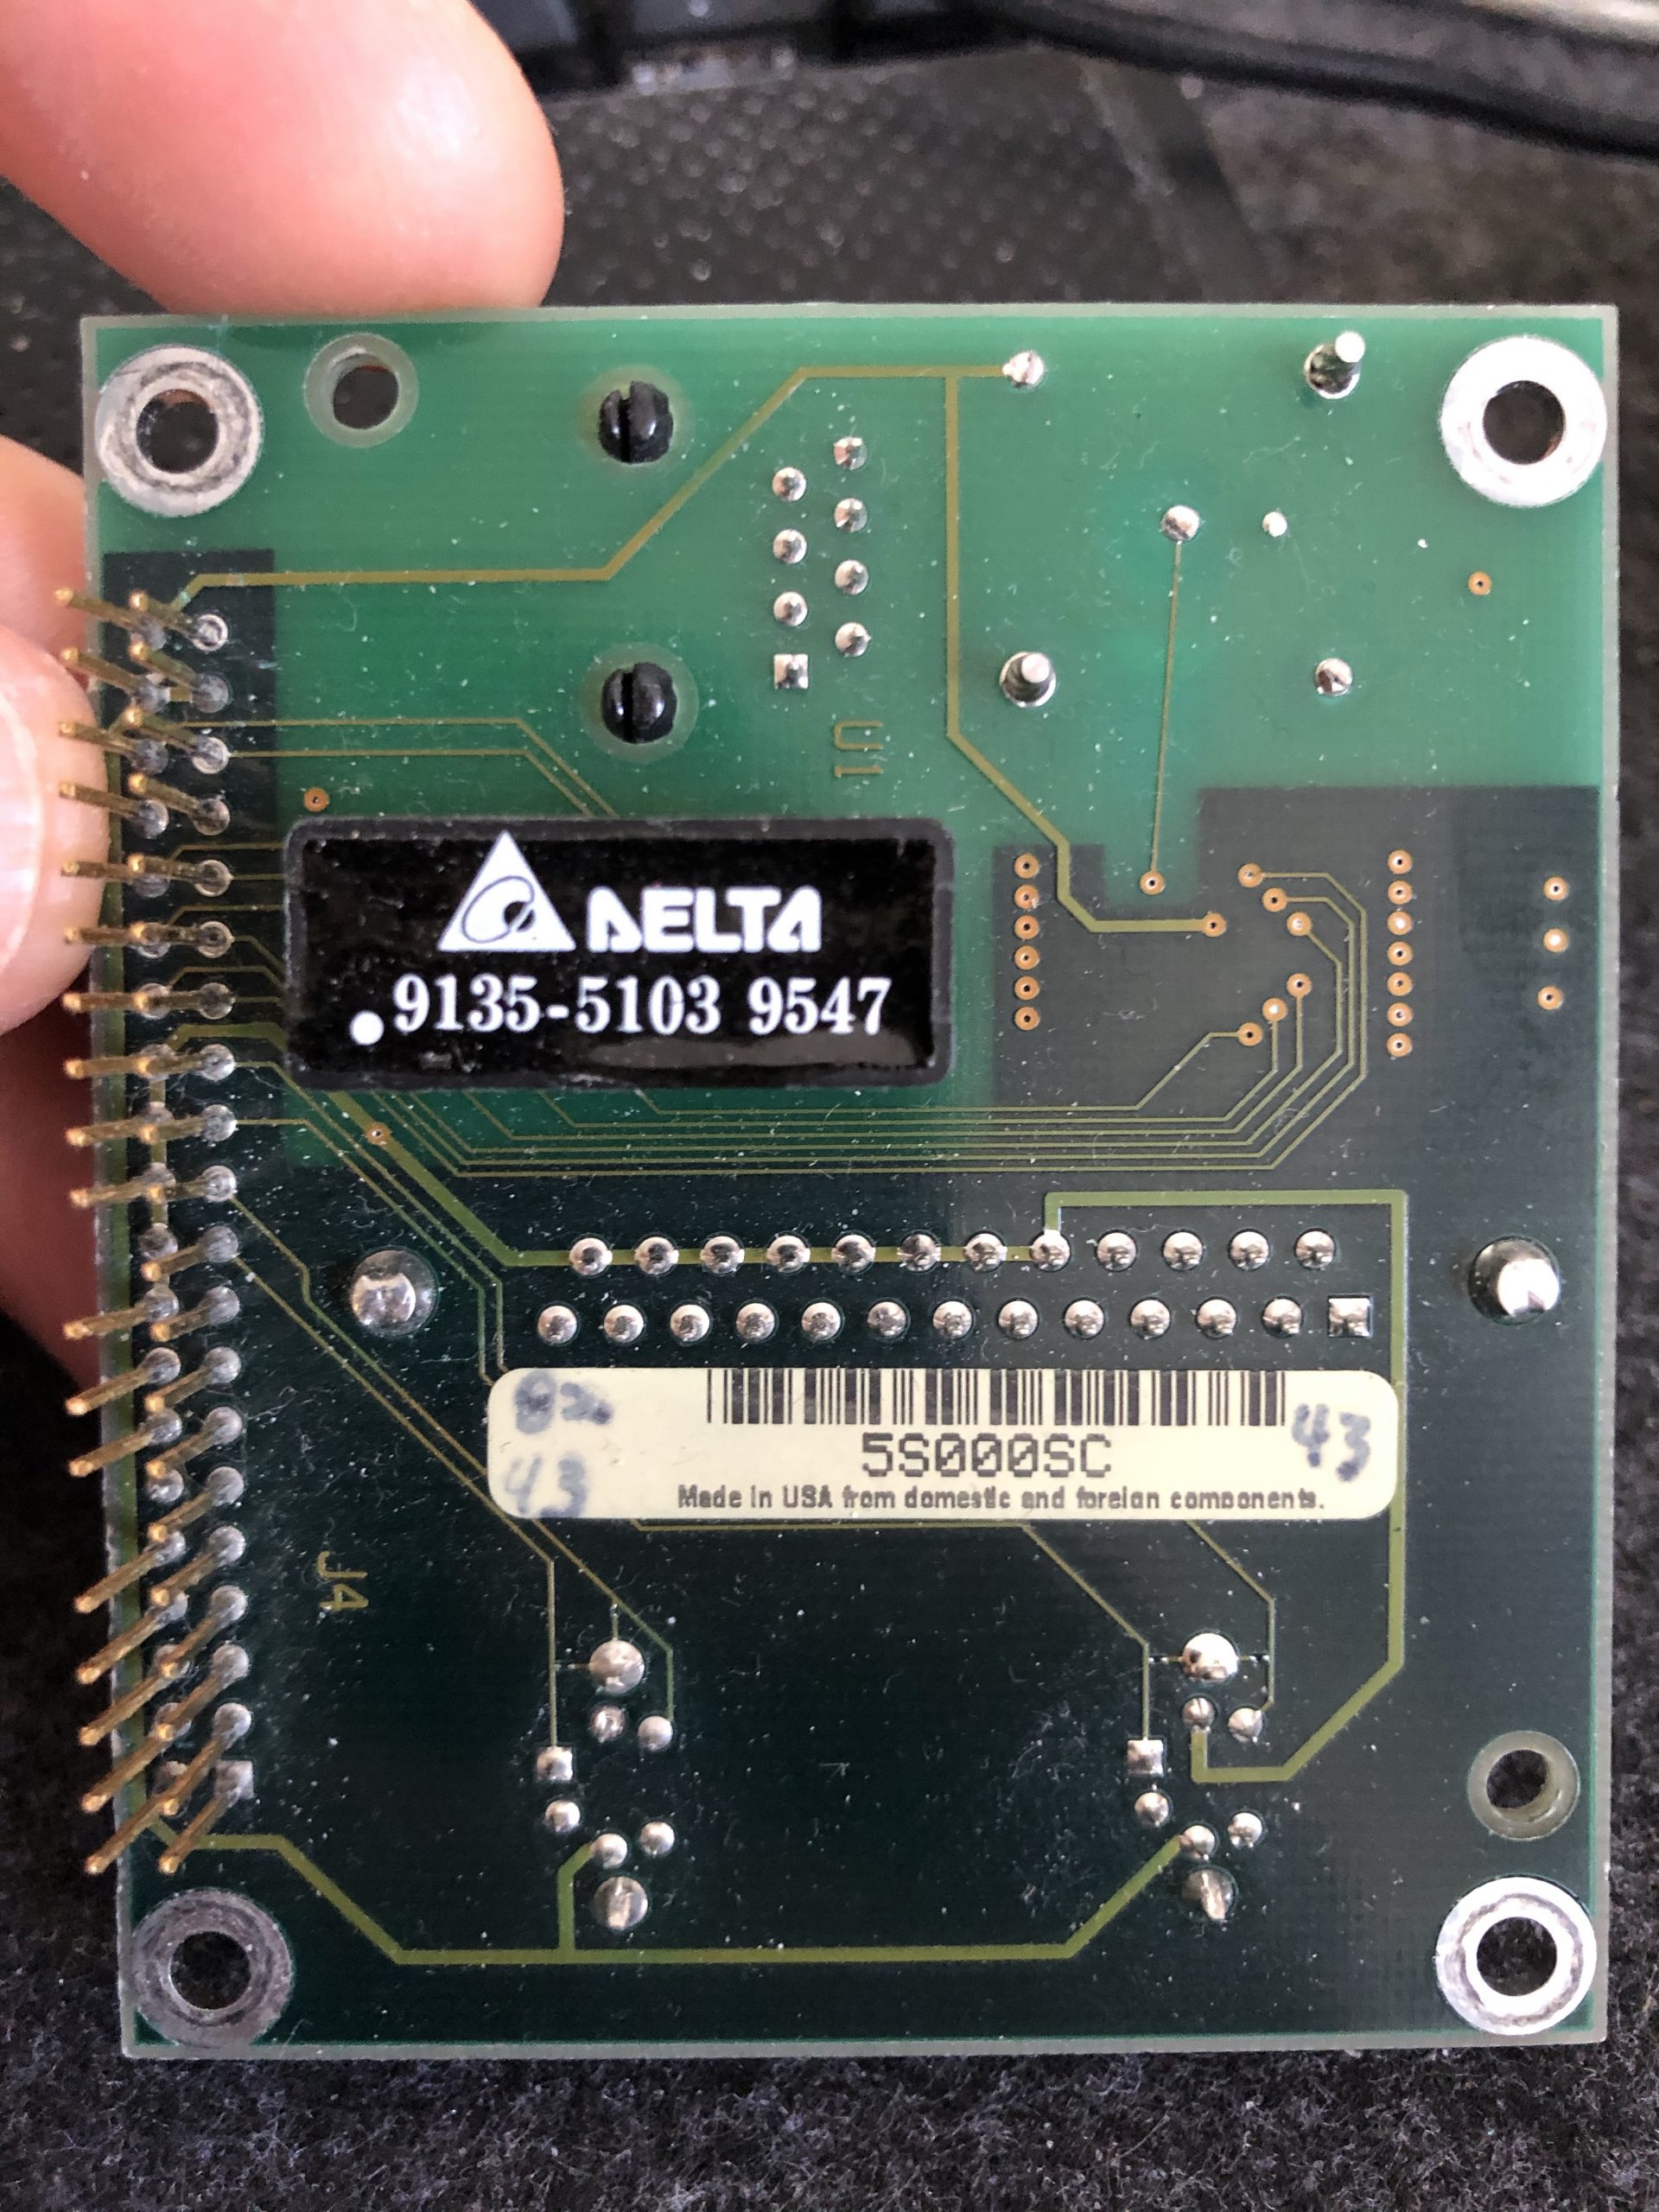
- The PCB with the keyboard, mouse, and Centronics printer connector is replaced with one that adds an RJ45 socket with appropriate magnetics, and a 10base2 transceiver and BNC socket.
- The firmware is replaced with one that includes support for X11.
Of these, it’s clear that the PCB with the extra ethernet hardware is the most challenging; the upgraded firmware is available directly from Keysight and 72-pin SIMMs are widely available. Most people don’t need the 10base2 interface, and the RJ45 10baseT is sufficient. Modern magjacks contain suitable magnetics, and so only that and some appropriate wiring is required.
The keyboard/mouse/printer/network PCB connects to the CPU board via a 40-pin IDC connector (i.e. the same ones you’d use for a PATA/IDE HDD). The following connections are required to make the HP1660C detect the network interface and make the magjack work.
- Pin 22 to 26 (ground to network interface detection)
- Pins 35 and 36 to TX on the magjack (pins 1+3 on the one I used)
- Pins 33 and 34 to RX on the magjack (pins 4+6 on the one I used)
- Ideally, wire up the grounds on the magjack to pin 22 or 24 (ground)
I actually used a magjack salvaged from an old dead Raspberry Pi. The resulting wiring for testing looked like this:
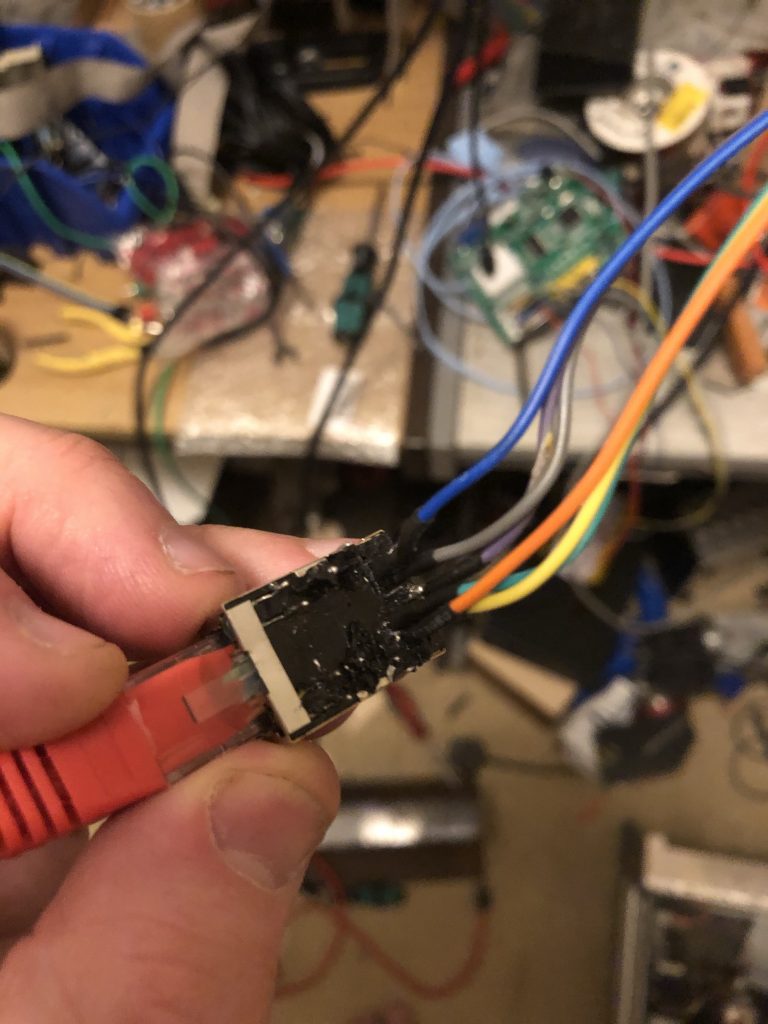
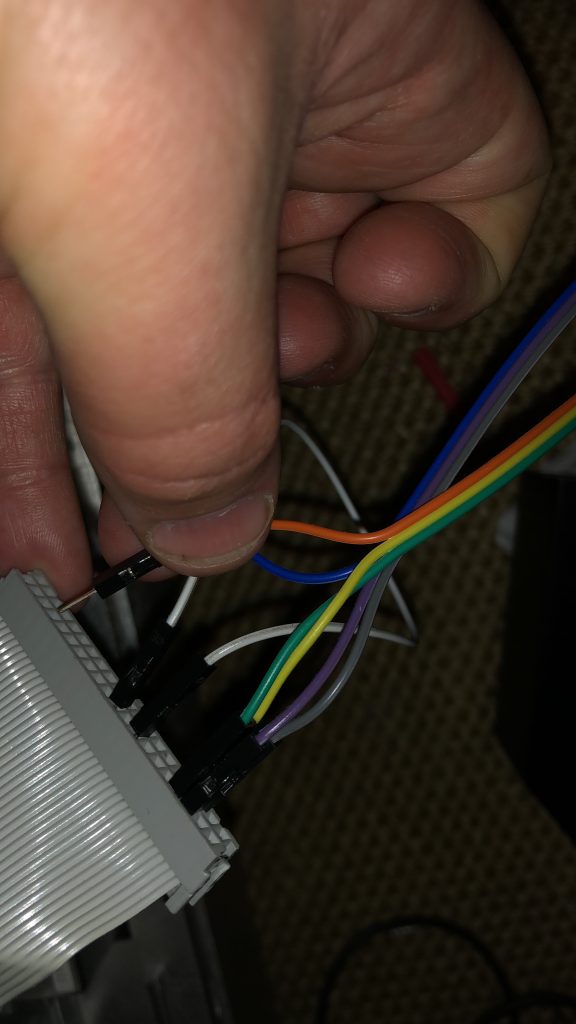
(Better photos to follow!)
Once the hardware is complete and connected up, and you’ve swapped in an 8MB SIMM, you’ll need to go into the “System” menu, and choose “Update Flash”. With the new hardware connected, the system will ask for SYSTEM.LAN instead of SYSTEM to be provided from the update floppies; run the update and you’re done!
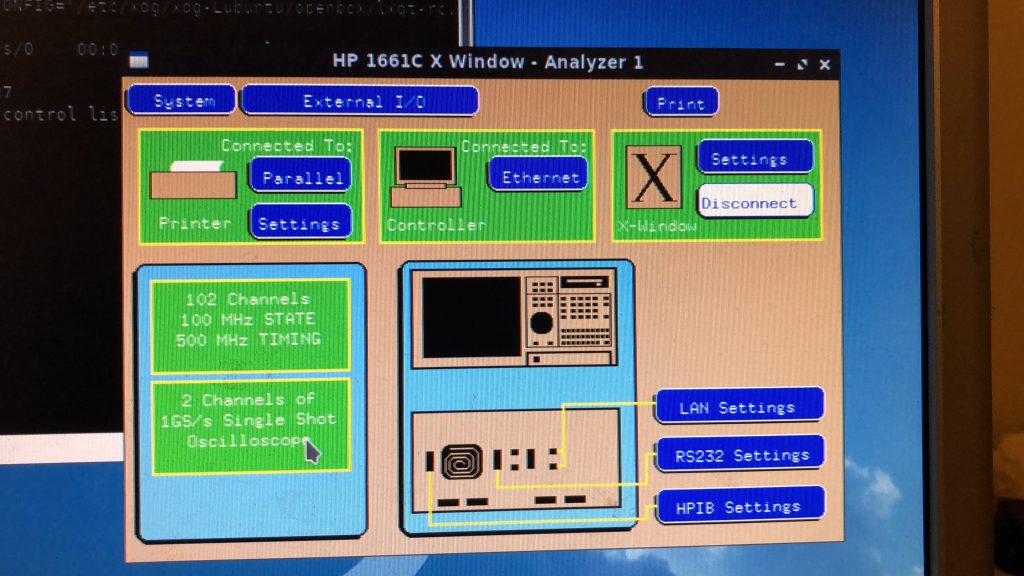
To make best use of the ‘scope once set up, you’ll need a machine running X, and configured to listen for and allow connections from the HP1660’s IP address. In addition it needs some specific fonts installed; these are provided on the firmware disk images from Keysight. If you’re doing this on Xubuntu, you’ll need to create /etc/lightdm/lightdm.conf.d/listen.conf and add the following:
[SeatDefaults]
xserver-allow-tcp=true
You’ll then need to allow the specific IP for your analyser using xhost +192.168.1.123 or similar. Finally, you can start the connection from the LA.
Edit: I’ve had a couple of requests for some photos of HP’s own board for this. Here you go!